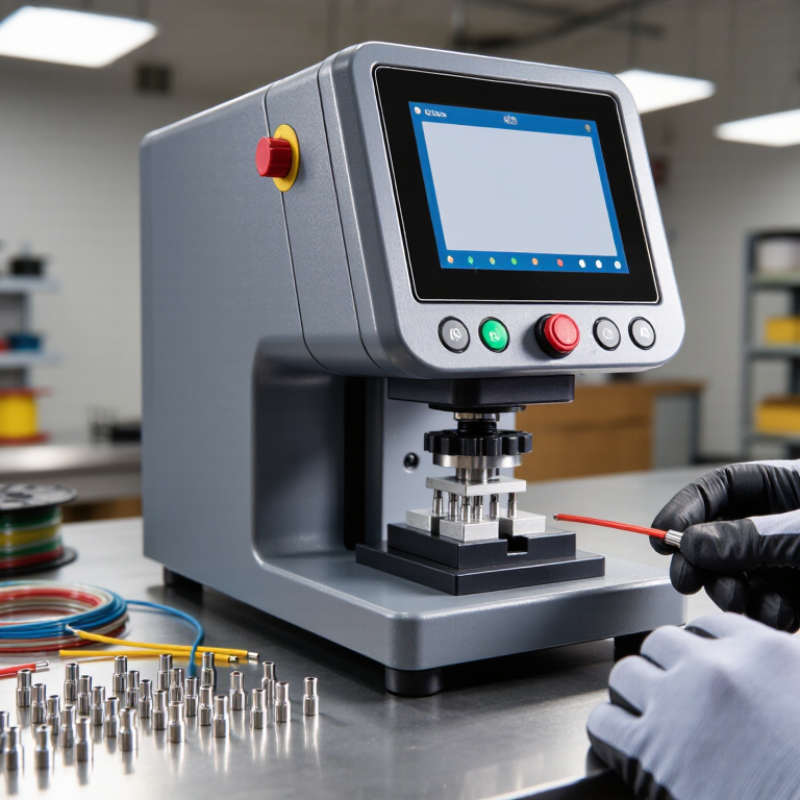
| Definition | Digital crimper | A powered crimping tool that uses an electronic control system and a display to monitor settings, operating status, battery condition, or completed cycles. | It is not automatically safer or more accurate than a manual tool; correct die selection and proper setup remain essential. |
| Main function | Terminal and connector crimping | The tool compresses a metal terminal around a stripped conductor to create a mechanically secure and electrically conductive connection. | A crimp should be formed only on the approved conductor and terminal combination; solder should not be used to compensate for a poor crimp. |
| Core components | Drive, jaws, dies, controller, display, and power source | The motor or hydraulic drive moves the jaws; interchangeable dies shape the terminal; the controller manages the cycle; the display provides status information. | Inspect jaws, pins, die cavities, trigger controls, housing, and cables before use. |
| How it works | Controlled compression cycle | After the terminal and wire are positioned, the tool advances the jaws through a programmed or trigger-controlled cycle and then releases or returns to its starting position. | Keep fingers, clothing, and loose objects away from the jaws during the entire cycle. |
| Digital controls | Display and electronic feedback | Depending on the tool, the display may show selected die information, battery level, cycle count, overload status, or a service warning. | Treat warning codes as instructions to stop and inspect the tool rather than repeatedly restarting it. |
| Typical applications | Electrical and wiring work | Common uses include insulated and non-insulated terminals, cable lugs, wire splices, and selected connector systems within the tool’s rated range. | Verify the tool’s approved wire-size range and connector type before starting a job. |
| Preparation | Select the correct die and terminal | Match the die cavity to the terminal design and conductor cross-sectional area or American Wire Gauge size specified by the tool or connector documentation. | Never force an oversized terminal into a smaller cavity or use a die that does not match the terminal profile. |
| Wire preparation | Strip and position the conductor | Remove insulation to the specified length without nicking or cutting the conductor. Insert the conductor fully into the terminal barrel before crimping. | Discard wires with damaged strands and keep insulation outside the electrical contact area unless the terminal design requires otherwise. |
| Operating sequence | Inspect, position, crimp, and release | Check the tool, install the die, place the terminal and wire, start the cycle, wait for full release, and remove the finished connection. | Do not interrupt a cycle by pulling on the wire. Use the designated manual-release mechanism if the jaws become stuck. |
| Quality check | Visual and mechanical inspection | A completed crimp should be centered, evenly formed, free from cracks, and firmly attached. A gentle pull test may be used when permitted by the applicable work standard. | Do not reuse a terminal that has been incorrectly crimped, crushed, or removed from a wire. |
| Electrical safety | De-energized work | Disconnect, isolate, and verify the absence of electrical power before crimping wires in an installation or assembly. | Use appropriate lockout and verification procedures where required. A crimper is not a substitute for electrical isolation. |
| Personal protection | Eye and hand protection | Safety glasses help protect against flying wire strands or metal fragments. Work gloves may be suitable when they do not reduce control of the tool. | Avoid loose gloves, jewelry, long hair, or clothing that could enter moving parts. |
| Battery safety | Rechargeable power source | Use the battery and charger specified for the tool. Keep contacts clean and charge the battery in a dry, ventilated location. | Stop using a battery that is swollen, leaking, unusually hot, cracked, or physically damaged. |
| Cleaning | Remove debris after use | Wipe the housing and jaws with a clean, dry or slightly damp cloth. Remove metal particles and insulation debris from die cavities. | Disconnect the battery or power source before cleaning. Do not spray liquid directly into the tool. |
| Lubrication | Moving parts and pivots | Lubricate only the points and with the lubricant specified in the tool’s service instructions. Some sealed mechanisms require no user lubrication. | Avoid oil on die surfaces, electrical contacts, sensors, and the display. |
| Inspection interval | Before every use and periodically | Check the tool before each job; perform a more detailed inspection after heavy use, a drop, exposure to moisture, or an abnormal crimp. | Remove the tool from service if cracks, excessive play, damaged insulation, inaccurate cycles, or hydraulic leakage is found. |
| Storage | Clean, dry, protected location | Store the tool with the jaws released, dies organized, and battery stored according to its charging and temperature requirements. | Protect the tool from excessive heat, moisture, dust, direct sunlight, and unauthorized use. |
| Professional service | Calibration and repair | Tools used for safety-critical or quality-controlled connections may require periodic force verification, calibration, or inspection by a qualified service provider. | Do not open the housing or modify the control system unless authorized service procedures specifically allow it. |