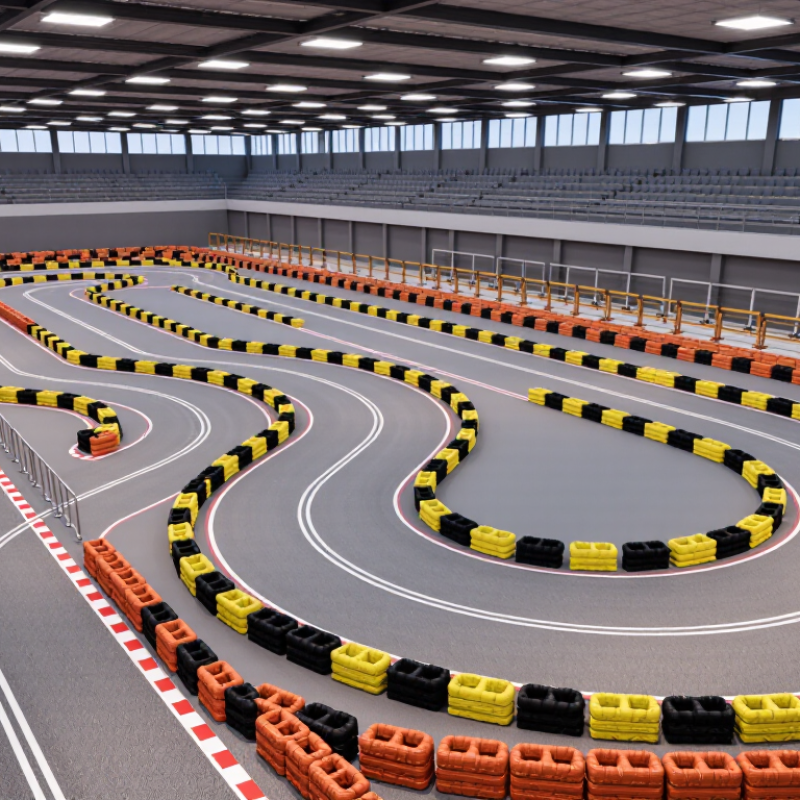
| Track Length | 600–1,000 m | 750 m | A 750 m layout provides enough time for overtaking, corner variety, and lap-time improvement without creating excessive walking or supervision distances. |
| Usable Track Width | 6–8 m | 7 m | Seven metres gives two karts more passing flexibility while maintaining a manageable surface area for barriers, drainage, and maintenance. |
| Track Direction | Clockwise or counterclockwise | One fixed direction | Use one direction during each operating session. A single flow direction simplifies marshal positioning, pit access, signage, and incident response. |
| Number of Corners | 8–14 corners per lap | 11 corners | Combine slow, medium, and fast corners so drivers must manage braking, turn-in, apex control, and acceleration rather than repeating one maneuver. |
| Hairpin Corners | 1–2 corners; 6–12 m inside radius | One 180° hairpin | A single hairpin creates a clear braking challenge and overtaking opportunity. Provide enough exit width to reduce contact during acceleration. |
| Medium-Speed Corners | 4–6 corners; 10–20 m inside radius | Five corners | Medium-speed turns should reward a smooth racing line and maintain momentum. Avoid placing every corner at the same radius or angle. |
| Fast Sweepers | 1–3 corners; 20–35 m inside radius | Two sweepers | Fast corners add rhythm and variety. Their final geometry, barrier placement, and runoff must be checked against the actual kart speed and local safety requirements. |
| Longest Straight | 80–180 m | 120 m | A straight of approximately 120 m allows drivers to build speed and creates a natural overtaking zone before a clearly visible braking corner. |
| Secondary Straights | 25–80 m | Three sections | Short and medium straights separate corner groups, improve driver recovery time, and prevent the circuit from feeling like one continuous technical section. |
| Braking Zone | 25–60 m approach area | One major zone plus two minor zones | Place the main braking zone at the end of the longest straight. Keep the entry line visible and avoid hiding the corner behind a crest or obstruction. |
| Corner Radius Transition | Use smooth entry and exit transitions | Progressive transitions | Clothoid-style or similarly smooth transitions reduce abrupt steering changes, make the kart easier to control, and produce more predictable driver flow. |
| Track Edge Clearance | Based on speed, barrier system, and local rules | Engineered individually | Do not use one clearance value for the entire circuit. Higher-speed corners and braking areas generally require more forgiving space than slow corners. |
| Runoff and Recovery Areas | Typically 8–15 m where site conditions allow | Wider at high-speed exits | Runoff should be prioritized at corner exits, braking areas, and locations where a kart could leave the racing surface at speed. Final dimensions require a site-specific safety review. |
| Pit Lane Width | 4–5 m for one-way kart movement | 4.5 m | Use a clearly separated, low-speed pit lane with controlled entry and exit points. Keep pit traffic from crossing the main racing line. |
| Pit Entry and Exit | Separate merge and diverge zones | Entry before a slow corner; exit after it | Connecting the pit lane near a slow section reduces speed differences. Provide sightlines so drivers can recognize merging karts early. |
| Starting Grid | On a straight of at least 50–70 m | 60 m grid straight | Keep the grid away from the first immediate apex where possible. A visible approach gives drivers time to settle into position before the start. |
| First Corner After the Start | 45°–120° turn; generous entry width | 90° medium-speed corner | A medium-speed first corner is easier to supervise than an extremely tight hairpin and can accommodate several karts without forcing abrupt braking. |
| Overtaking Opportunities | 2–4 clear zones per lap | Three zones | Place overtaking zones at the end of straights leading into slow or medium-speed corners. Avoid relying on only one passing location for the entire lap. |
| Driver Sightlines | Visible approach to every major hazard | No blind high-speed conflict points | Use the layout, barrier alignment, marshal posts, and signage to maintain early visibility of stopped karts, merging traffic, and changing track direction. |
| Marshal Post Coverage | At every major incident or blind-risk location | Corner groups plus pit entry and exit | Position posts where staff can see the relevant section and communicate with neighboring posts. Final spacing depends on visibility, circuit length, and operating procedures. |
| Drainage and Crossfall | Designed by a civil engineer for the site | Positive drainage without standing water | Maintain a consistent surface that sheds water without creating abrupt crossfall changes in braking or cornering areas. Local stormwater requirements must be followed. |
| Lap-Time Target | Approximately 45–75 seconds | About 60 seconds | A lap near one minute is long enough to reward learning and short enough to keep sessions easy to supervise. Actual time depends on kart performance and driver skill. |
| Traffic Capacity | Set by track length, width, speed, and operating rules | Use controlled session sizes | Determine the maximum number of karts through operational testing, not track length alone. Separate slower and faster driver groups when appropriate. |
| Surface and Markings | Uniform paved surface with high-visibility markings | Consistent grip and clear edge lines | Use durable markings for the racing edge, pit lane, grid, and hazard areas. Avoid sudden grip changes between repaired and original pavement. |
| Driver Flow Sequence | Grid → start straight → braking zone → technical section → overtaking straight → pit return | One continuous loop | A balanced sequence alternates high-speed and low-speed sections, creates regular decision points, and returns drivers to the main straight without crossing opposing traffic. |